


Choosing the right whiteboard mounting hardware is one of those small details that makes a huge difference. Get it right, and your board is a secure, permanent fixture on the wall. Get it wrong, and you're looking at a wobbly, unsafe setup that could come crashing down. It all comes down to matching the right screws, anchors, or brackets to your specific wall and the weight of your calendar.
What Kind of Whiteboard Mounting Hardware Do You Actually Need?

Before you start drilling, let’s talk hardware. This is the crucial step that separates a family command center that lasts for years from one that's a genuine safety hazard.
While most whiteboards and digital calendars like the Everblog ship with a standard mounting kit, don't just assume it’s the right one for your home. Those kits are almost always designed for the simplest scenario: screwing directly into wood studs behind a drywall wall. Your walls might have other ideas.
When to Use the Included Kit vs. Buying Your Own
So, should you trust the hardware in the box? Maybe. It’s a good starting point, but it’s definitely not a universal solution.
Take a good look at the screws and anchors they gave you. If your walls are plaster, brick, or concrete, that standard kit is almost certainly not going to cut it. You'll need to head to the hardware store for something specialized.
Even with standard drywall, if you can’t line the board’s mounting holes up perfectly with the wall studs, the included screws are useless on their own. For hollow sections of drywall, you'll need to upgrade to heavy-duty drywall anchors—like toggle bolts or strap toggles—that can grip the wall from behind.
The Most Important Rule: Respect the Weight
If you remember one thing, make it this: weight matters most. First, find the exact weight of your whiteboard or digital calendar. It should be in the product manual or on the manufacturer's website.
Safety First: Always pick mounting hardware rated to hold at least double the weight of your board. For a 25-pound digital calendar, your hardware needs a rating of 50 pounds or more. This isn't just about holding the board; it’s about creating a safety buffer for the forces of daily life—writing, erasing, and even kids leaning on it.
The hardware market has come a long way. A decade ago, mounts were an afterthought. But with the rise of heavier, interactive smartboards, we've seen a ton of innovation. You can now find heavy-duty steel mounts with anti-vibration tech designed for screens over 100 pounds, though these can cost between $150 and $850. It's a reflection of a 40-50% price increase across the industry to meet the demand for safer, stronger options.
To help you sort through the options, here’s a quick comparison of the most common hardware types you'll encounter.
Mounting Hardware Quick Comparison Guide
This table breaks down common mounting hardware, what they're best for in a family hub setting, and how much weight they can typically handle.
| Hardware Type | Best For | Typical Load Capacity | Key Benefit |
|---|---|---|---|
| Z-Clips | A clean, "floating" look; great for heavy boards. | 75-200 lbs | The two interlocking clips make it easy to hang and remove the board. |
| Standoff Bolts | A modern, decorative look where the hardware is visible. | 25-50 lbs per bolt | Creates an elegant gap between the board and the wall. |
| L-Brackets | A simple, budget-friendly option for lighter boards. | 20-40 lbs per pair | Very straightforward installation and widely available. |
| Toggle Bolts | Hollow drywall where you can't hit a stud. | 50-100+ lbs | Excellent holding power in drywall by bracing against the back of the wall. |
| Direct to Stud | The gold standard for any heavy item on drywall. | 100+ lbs | The most secure mounting method possible. |
Ultimately, the goal is to choose the hardware that gives you the most secure connection to your specific wall type, so you never have to worry about it.
Comparing Fixed Mounts and Portable Stands
You also have a choice between a permanent installation and a more flexible one.
- Fixed Wall Mounts: This is the go-to for creating that permanent family command center. Your options range from simple L-brackets and Z-clips to elegant standoff bolts that give the board a cool "floating" effect.
- Portable Floor Stands: Need to move the board between the kitchen and the living room for homework? A floor stand is your best bet. A good one will run you anywhere from $250 to $1,500, depending on how sturdy and feature-rich it is.
No matter which path you choose, selecting high-quality fasteners for secure mounting is absolutely non-negotiable for a strong, reliable connection.
Once you’ve settled on your hardware, the next big decision is placement. To get that right, check out our guide on the ideal kitchen touchscreen mounting height for busy families.
Gathering Your Tools and Prepping the Space
A perfectly hung calendar doesn't happen by accident. The secret isn't in the final moments of drilling—it's won in the prep work you do before a single tool touches your wall. Taking a few minutes to get organized is what separates a quick, satisfying project from a weekend-long headache.
First things first: unbox your new calendar and give it a once-over. Lay it on a soft surface, like a blanket on the floor, to keep it from getting scratched. Check the frame for dings and make sure all the whiteboard mounting hardware that’s supposed to be in the box is actually there. It’s a lot less frustrating to find a missing screw now than when you’re halfway through the installation.
Your Essential Tool Checklist
While every project is a little different, there's a core set of tools that will make your life a whole lot easier. Don't just grab a drill and hope for the best. Having these on hand from the start is the key to a pro-level finish.
- A Reliable Stud Finder: This is non-negotiable for drywall. A good electronic stud finder does more than just locate studs for a secure mount; it helps you steer clear of hidden electrical wires and plumbing.
- A Quality Level: Eyeballing it is the fastest way to end up with a crooked board. A 24-inch or 48-inch level is perfect for making sure your marks are perfectly horizontal before you start drilling.
- Tape Measure: Accuracy is everything here. You'll need it to measure the wall, the board itself, and the spacing for your mounting points.
- Pencil and Painter’s Tape: Use a pencil for light marks you can easily erase. Here’s a pro tip: painter's tape is my secret weapon. You can mark your drill spots directly on the tape without writing on the wall, and it peels off clean when you're done.
- Power Drill and the Right Bits: Your wall type dictates the bit you'll need. A standard Phillips-head works for most screws, but you’ll need a tough masonry bit for concrete or a special tile-and-glass bit for a kitchen backsplash.
The one rule I absolutely live by is: measure twice, drill once. Seriously. Taking an extra 60 seconds to double-check your measurements will save you the pain of patching and repainting unnecessary holes later.
Finding the Perfect Spot
Where you hang your board is just as important as how you hang it. The goal is to create a command center that everyone in the family can see and use without any hassle.
Start by thinking about foot traffic and visibility. You want it in a central spot, but not somewhere it's constantly blocked by an open door or a piece of furniture. And be sure to check for glare—a glossy whiteboard can be impossible to read if it's catching direct sunlight or a bright overhead light.
Next, let's talk height. A common mistake is hanging the board too high for kids or too low for adults. A great rule of thumb is to center it at about 60 inches from the floor. This puts the heart of the calendar at eye-level for most adults, while keeping the bottom third within easy reach for kids. Before you commit, get your family to stand in the spot and pretend to use it. It's the best way to know for sure if it feels right for everyone.
How to Mount Your Whiteboard on Any Wall Type
Alright, you’ve picked out your perfect calendar. Now for the moment of truth: getting it on the wall. The secret to a rock-solid installation isn't the board itself—it's knowing what your wall is made of and using the right whiteboard mounting hardware for the job.
Before you drill a single hole, every mounting job boils down to three simple steps: inspect your gear, measure your space, and mark your drill points.

Stick to this order, and you’ll avoid any "oops" moments. It’s all about having the right tools and precise measurements before you commit.
Tackling Standard Drywall
Most modern homes have drywall, but it’s essentially a gypsum sheet with a whole lot of empty space behind it. That’s why your first move is always to find the wood studs hidden in the wall.
Grab an electronic stud finder and slide it horizontally across the area where you plan to hang the board. Use a little painter's tape to mark the left and right edges of each stud you locate. Driving your screws directly into the center of these studs is the absolute best way to ensure a secure mount.
But let's be realistic—the studs almost never line up perfectly with your board's mounting holes. When that happens, you’ll need some heavy-duty drywall anchors for any screws going into a hollow spot.
- Toggle Bolts: These are my go-to for anything with some heft. You drill a hole, pinch the spring-loaded "wings" on the bolt, and push it through. Once inside the wall, the wings snap open, creating a super-strong anchor point.
- Strap Toggles: Think of these as a modern, user-friendly version of the classic toggle bolt. They offer incredible holding power and are especially great for heavier digital calendars.
A word of caution: stay away from the tiny, plastic cone-shaped anchors that come in most generic hardware kits. They're fine for a tiny picture frame, but they just don't have the grip to safely hold a whiteboard or calendar that your family will be using every day.
Working with Old Plaster Walls
If you live in an older home, you might have plaster walls. They're much thicker, harder, and more brittle than drywall, and drilling into them the wrong way can cause a spiderweb of cracks.
The trick is to go slow. Start by putting a small piece of painter's tape over your mark—this stops the drill bit from wandering and helps prevent the surface from chipping.
Set your drill to a low speed and use a sharp, standard drill bit. Apply steady but gentle pressure; let the drill do the work for you. Once you’re through the plaster and the lath (the wood strips behind it), you can install your hardware. Toggle bolts are an excellent choice here, too.
If you’re renting or just worried about damaging fragile walls, you might want to skip drilling altogether. We’ve got a full guide on how to mount a digital calendar in a rental without drilling that explores some fantastic alternatives.
Mounting on Concrete or Brick
Hanging your board on a solid masonry wall like concrete or brick gives you an incredibly sturdy foundation, but it demands some special tools. Your standard drill bits and screws just won't cut it.
You’ll need three things:
- A Hammer Drill: This drill adds a rapid hammering motion as it spins, which makes drilling into hard materials like concrete surprisingly easy.
- A Masonry Drill Bit: These have a carbide tip designed specifically to pulverize brick and concrete without burning out.
- Masonry Anchors: Concrete screws (like Tapcons) or sleeve anchors are made to expand and grip the inside of the hole, creating an unshakeable hold.
Once your spots are marked, use the hammer drill and masonry bit to make your holes. Go slightly deeper than the length of your anchor. Then, clear out all the dust, tap in the anchor, and attach your mounting bracket.
The Challenge of Tiling
Mounting something on a tiled surface, like a kitchen backsplash, feels nerve-wracking. Nobody wants to be the one who shatters an expensive tile. But with a little patience and the right tool, it’s totally manageable. I mounted my own Everblog calendar right on my kitchen tile, and it looks seamless.
The absolute must-have tool here is a glass-and-tile drill bit. It has a spear-shaped head that grinds a clean hole instead of chipping the tile.
First, put a piece of painter’s tape over your mark to keep the bit from slipping. Start drilling at a very low speed with very light pressure. To be extra safe, you can dip the bit's tip in water every so often to keep it cool and prevent the tile from cracking due to heat. Once you're through the tile, you can switch to a regular bit for the wall behind it and use the right anchor for that material.
Since the mid-2010s, mounting best practices have become pretty standard. A good rule of thumb is one mounting bracket per foot of board width. So, an 8x4 foot board would need at least eight mounting points. A full hardware kit with clips, 2.5-inch L-brackets, screws, and anchors often costs less than $20 and can safely support 200+ pounds. As of 2026, over 90% of major brands include all the necessary drywall hardware, giving you the flexibility to mount your board vertically or horizontally to fit your space.
While this guide is focused on calendars and whiteboards, these principles apply to hanging almost any heavy item securely. For more professional insights, checking out how experts handle similar jobs, like TV wall mounting services, can give you some extra confidence.
Ensuring a Safe and Secure Installation
Hanging a heavy whiteboard or digital calendar on the wall, especially in a house with kids, can feel a little nerve-wracking. A proper installation is about more than just getting it level—it’s about making sure it’s a truly safe and permanent fixture in your home.
Getting this right from the start means your new family command center will stand up to daily life without ever becoming loose or wobbly. It all comes down to two things: choosing the right hardware for the job and putting it in a spot that actually makes sense for your family.
Getting the Weight and Hardware Right
When you pick up a pack of whiteboard mounting hardware, the most important piece of information is the weight or load rating. This number tells you the maximum weight the hardware can safely hold, but that's under perfect, lab-like conditions.
Real life isn't a lab. Kids lean on things, people bump into walls, and you want a setup that can handle it all without a second thought. This is where you need to over-engineer it a bit.
My personal rule is simple: always choose hardware rated to hold at least twice the weight of your board. So, if your digital calendar weighs 25 pounds, your mounting hardware needs a minimum load rating of 50 pounds. This creates a crucial safety buffer for all the unpredictable forces of a busy home.
It’s also why using more anchors is always better. While one anchor might technically support the weight, two anchors distribute that load and make the whole thing exponentially more stable. Spreading the stress across a wider section of the wall drastically reduces the risk of it pulling loose over time.
Smart Placement for a Busy Family
Beyond the hardware, where you hang the board is just as important for both safety and daily use. A poorly placed board can be anything from a minor annoyance to a legitimate hazard.
Think about the flow of traffic in your home. A floor stand might seem flexible, but it can easily become a trip hazard if you stick it in a narrow hallway or too close to a doorway. For wall-mounted boards, the biggest considerations are height and accessibility.
You want to find that sweet spot that works for everyone.
- For Adults: The center of the board should sit roughly at eye level.
- For Kids: The bottom half needs to be low enough for them to comfortably reach.
A great place to start is by centering the board at approximately 60 inches from the floor. This usually puts the middle at a comfortable viewing height for most adults, while keeping the bottom half accessible for younger kids to check off chores or scribble notes.
Making It a Functional Command Center
The best placement turns your board from a simple calendar into the true hub of your household. That means putting it in a high-traffic area where everyone will see it multiple times a day. The kitchen is a classic for a reason—it’s where mornings get started and evenings wind down.
Think of it as the central dashboard for your family's daily operations. You can plan meals right where you cook them and manage schedules where everyone gathers.
If you’re installing a digital calendar, you’ll also have to think about cable management. A dangling power cord is not just messy; it’s an open invitation for little hands to grab and pull. It's smart to plan for this from the get-go. For a few clever solutions, you can learn more about how to hide cords for wall-mounted tech to keep your setup looking clean and safe.
Ultimately, a secure installation comes from a mix of strong hardware, smart placement, and a bit of foresight. By respecting the weight of your board and thinking through how your family will actually use it, you can create a reliable and functional centerpiece for your home that will serve you well for years.
Troubleshooting Common Installation Hiccups

You’ve done everything right. You measured twice, picked the perfect spot, and start drilling... only to hit something that stops your drill bit dead in its tracks. It's that crunch moment every DIYer dreads.
Don't panic. These little surprises are part of the process, and they're almost always fixable. A little troubleshooting know-how can turn a project-ending disaster into a minor speed bump.
Handling Unexpected Obstacles in the Wall
One of the most common hangups is hitting something you didn't see coming behind the drywall. Your stud finder gave you the all-clear, but your drill bit tells a different story.
If you drill and meet immediate, hard resistance, just stop. You’ve likely hit a metal stud or a steel plate that’s protecting plumbing or electrical wires. Do not try to power through it. The simplest solution is to move your mounting hole an inch or two to the side and try again. While you can use special self-tapping screws for metal studs, just shifting your anchor point is usually the path of least resistance.
On the other hand, if you're drilling into an old plaster wall and it starts to crumble, you're dealing with another classic headache. To stop a small hole from becoming a crater, just apply a strip of painter's tape over the spot before you drill. This one tiny step helps hold the brittle surface together and gives you a much cleaner hole.
Fixing Common Mounting Mistakes
Mistakes happen. Maybe you drilled in the wrong spot, or a screw just won't grab. Here’s how to fix some of the most frequent installation flubs without having to call for backup.
-
The Stripped Screw Hole: You overtighten a screw in a wood stud, and now it just spins without getting any tighter. You've stripped the wood. The classic fix is to back the screw out, dip a few wooden toothpicks or a golf tee in wood glue, and shove them into the hole. Snap them off flush, wait for the glue to dry, and you'll have fresh wood for the screw to bite into.
-
The "Oops" Hole: Drilled in the completely wrong place? It’s an easy fix. For small holes in drywall, just grab some lightweight spackle and a putty knife. Fill the hole, let it dry, sand it smooth, and touch it up with paint. No one will ever know it was there.
-
The Wobbly Mount: If your board feels loose after you hang it, your anchors are the problem. They're either not engaged properly or are the wrong type for your wall. A wobbly board is an unsafe board, period. Take it down, pull out the inadequate anchors, and replace them with something stronger, like toggle bolts.
Don't ever settle for a slightly crooked board. Most whiteboard mounting hardware has a little play built right in. If your board is just a hair off-level, have someone hold it perfectly straight while you slightly loosen the mounting screws. Once it's level, just re-tighten everything. That tiny adjustment is often all it takes.
Frequently Asked Questions About Mounting
Even after you've read all the steps, a few last-minute questions always seem to pop up right when you’re about to drill that first hole. We get it. Here are some quick answers to the most common questions we hear, so you can feel confident you’re getting it right.
What Is the Best Wall Anchor for Drywall Without a Stud?
If you can’t hit a stud, my go-to is always a toggle bolt or a strap toggle. They offer way more holding power than the flimsy plastic anchors that often come included in mounting kits.
These anchors work by bracing themselves against the back of the drywall. You just drill a hole big enough for the folded toggle to slip through, and it springs open inside the wall, spreading the weight over a much larger area. This makes them perfect for heavier items like a digital calendar, giving your whiteboard mounting hardware a rock-solid grip.
One of the most common reasons an installation fails is from using undersized plastic anchors in drywall. Spending a few extra dollars on proper toggle bolts is well worth the peace of mind.
How High Should I Mount a Whiteboard for the Whole Family?
Finding the perfect height is a balancing act. A good rule of thumb is to center the board at about 60 inches (or 152 cm) from the floor.
This puts the main screen right at eye level for most adults, making it easy to check schedules or glance at the meal plan. At the same time, the bottom of the board is low enough for kids to reach, so they can check off chores or add their own notes. You can always tweak this a bit to find the sweet spot that works for your family's heights.
Can I Mount a Whiteboard on a Textured Wall?
Absolutely. You can definitely mount a board on a textured wall, whether it's an orange peel or knockdown finish. The key is making sure the mounting brackets sit completely flat against the solid part of the wall, not just floating on top of the texture.
To get a secure fit, you might need to gently sand down the high spots of the texture right where each bracket will sit. This creates a small, flat surface for the bracket to rest on so it won’t wobble. Once you’ve done that, you can drill and install your anchors just like you would on a smooth wall.
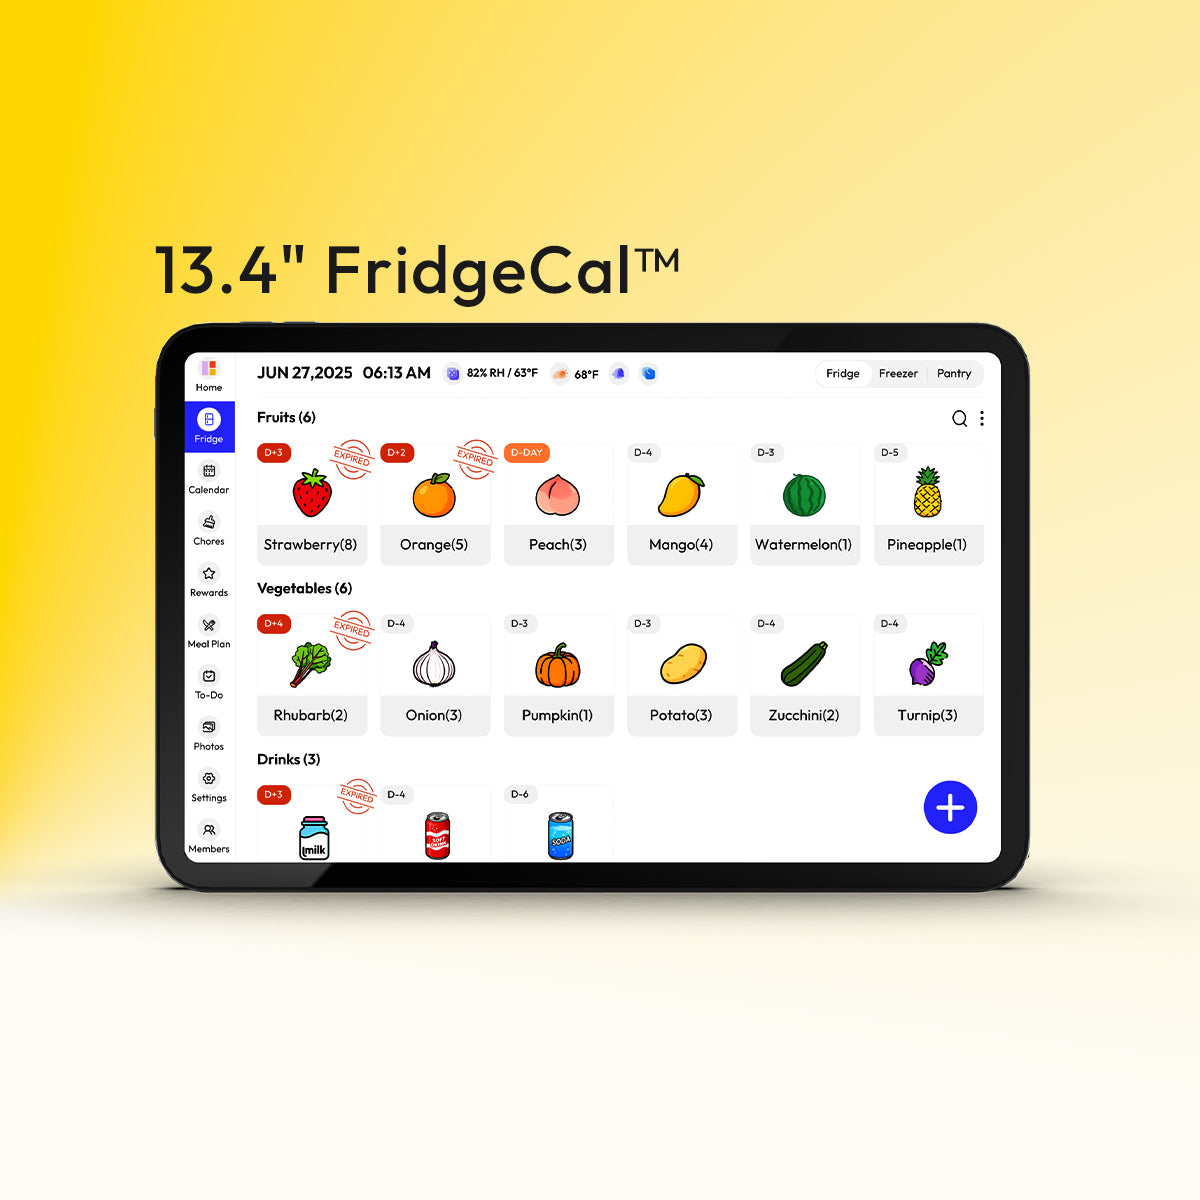
Ready to get your family’s command center up and running? The Everblog digital calendar pulls all your schedules, chores, and meal plans together on one beautiful display. Learn more about how Everblog can organize your home today.


