


Family calendars sound perfect until everyone stops looking at them a week later. The problem isn't the calendar itself. It's that appointments all blend together, reminders won't quit buzzing, and people don't know what belongs there and what doesn't. Skip simple setup steps like color coding each person or choosing helpful reminder times, and your calendar becomes a wall decoration. Take ten minutes to do it properly, and the whole family will actually use it.
Step 1: Mount It Where Your Family Actually Looks
A digital calendar only works if people see it. Before messing with any settings, figure out where this screen will live. You've got two choices: mounted on the wall or sitting on a calendar stand. Most families go with wall mounting—it keeps the calendar at eye level in spots everyone passes by. But if you need to move it around or can't drill holes, a calendar stand is the way to go.
Wall Mounting: What Most Families Choose

Mounting your calendar on the wall keeps it visible without taking up counter space.
Best Mounting Locations:
- Kitchen wall near the fridge – Right where you plan meals and check groceries
- Mudroom or entryway – Catches everyone coming and goin
- Family command center – Next to backpack hooks and the key rack
Get the Height Right:
Mount it so the center of the screen sits at adult eye level—about 60 inches from the floor to the middle of the display. If kids need to reach it for chores, lower it 6-8 inches. Make sure the power cord reaches an outlet without crossing walkways.
Two Mounting Options:
| Method | How It Works | Best For |
| Hanging strap | Loop through the back, hang on a nail or hook | Quick setup, easy to relocate |
| Wall screws | Use mounting slots on the back | Permanent, secure install (find a stud first) |
Calendar Stand: For Counters and Desks
If you're renting and can't put holes in walls, or if you just want the calendar on your kitchen counter instead of mounted on the wall, grab the separate calendar stand. It's designed to make setup dead simple—no drilling, no tools, just attach the mounting plate with the included screws, snap the calendar in, and you're done.
Where to put your calendar stand:
- Kitchen counter or island: This is where most families put it since you're in the kitchen all day anyway. Easy to check while cooking or packing lunches. Just keep it back from the stove to avoid grease splatter.
- Dining room sideboard: Great spot if your family gathers here for meals. Everyone can check the schedule while eating breakfast or dinner without hunting for their phones.
- Home office desk: Works well if one parent handles most of the family scheduling. Keeps the calendar within arm's reach while you're working and planning.
If wall mounting doesn't work for your space, the aluminum construction and 77.7° viewing angle of Everblog Digital Calendar Stand give you a clear view whether you're standing at the counter or sitting at the table. Just pick a stable spot where it won't get knocked over when kids run past or bags get tossed down after school.
Check These Before Plugging It In
Before you mount it on the wall or put it on the calendar stand, check these first:
1. Can you reach an outlet?
The cord is not that long. Measure how far you are from the plug. Too far? You'll need an extension cord and the cable slots on the back to keep it organized.
2. How's your Wi-Fi?
The calendar will need to connect to the internet to sync with Google, Outlook, and all the phones. Make sure you have a strong Wi-Fi signal where you plan to place it. No Wi-Fi? You may need to put the router closer to the calendar.
3. Will the sun wash it out?
Avoid placing it directly across from a light source. The sun will make the screen unreadable, even with auto-brightness on.
4. Is it in the way?
Choose a location where you can easily see and touch it without bumping into it or dirtying it with grimy hands as you walk by.
After mounting the calendar on the wall or placing it on the calendar stand, plug it in and turn it on. The setup screen will guide you through the Wi-Fi setup. Select your network name and enter the password. You're done. Now you can start adding colors and setting up the rest.
Step 2: Set Up Colors and Names for Instant Clarity

A calendar filled with text is useless when you're running out the door in the morning. You need to see at a glance who needs to be where. That's why the Everblog uses color coding—not to look pretty, but to make the calendar actually readable across the room.
1. Give Each Person Their Own Color
Give each person in the family a unique, distinct color. Ensure the colors can be easily distinguished when you are across the room. Here’s a system that works:
| Family Member | Color | Why It Works |
| Dad | Blue | Cool tones for adults |
| Mom | Green | Easy to distinguish from Dad |
| Emma (10) | Orange | Warm tones for kids |
| Max (7) | Red | High contrast with Emma |
| Whole Family | Gray | Neutral for shared events |
The biggest mistake? Creating too many color categories. You don't need separate colors for "soccer practice" and "doctor appointments." Those are both Max's events, so they're both red. The point is knowing whose schedule you're looking at, not sorting by activity type.
Bonus: The Everblog also has color-coded LED lights that glow with each person's color for notifications. So when Max's reminder pops up, the light glows red. No reading required.
2. Write Clear Event Titles
Colors tell you who. Event titles tell you what and where. Use this simple format: [Action] at [Location].
- Not just "dentist" → "Dentist at Bright Smiles"
- Not "practice" → "Soccer practice at Lincoln Field"
For chores and tasks on the digital chore chart, add who's responsible: [Task] - [Owner].
- "Take out trash - Max"
- "Fold laundry - Mom"
Even though Max's color already shows it's his task, adding the name stops the "whose turn is it?" arguments.
3. Keep It Consistent
If you write "Piano lesson - 4:00 PM" one week and "Emma piano" the next, no one knows what time to leave. Pick your format on day one and stick with it. Consistency makes the calendar reliable.
Step 3: Sync Work and Family Calendars Without Creating a Mess
Many people use multiple calendars: Google for personal things, Outlook for work, and perhaps a school calendar too. Getting all those to display in one place without creating a mess requires some planning.
Why Work Calendars Should Stay Read-Only
When you sync your work calendar with a family calendar display, set it as read-only. Here's how you should do it:
1. Import work calendars as view-only.
Your work meetings show up on the family calendar, but nobody can inadvertently delete an important client call while trying to add a soccer practice.
2. Keep your actual work calendar untouched.
Your Outlook or Google calendar looks just the same as it does now—the Everblog just shows a copy of it. Any changes you make at work will automatically appear on the family display.
3. Give full editing access to family calendars.
Both parents can add, change, or delete family events without having to ask anyone or fight for access.
4. Set older kids to view-only.
They can see what’s on the calendar, but they cannot inadvertently change it. Your younger kids don’t even need to see the calendar display—you just show them the screen.
Fix Common Sync Problems
Here's what goes wrong most often, and the actual fixes:
1. Duplicate events showing up?
You've probably synced the same calendar twice using different methods. Go into your calendar connections and remove one of them.
2. Times are wrong?
Check your time zone settings. The Everblog needs to use your actual local time zone, not automatically adjust based on where events were created. A 3 PM dentist appointment should show up at 3 PM, not 6 PM.
3. Reminders aren't working?
Syncing doesn't copy notification settings from your other calendars. You'll need to set up reminders directly on the Everblog for synced events.
4. Calendar not updating?
Synced calendars typically refresh on a schedule rather than instantly—updates may take anywhere from 15 minutes to an hour to appear. If you just added something important and need to see it right away, use the manual refresh option to sync immediately.
Yes, getting sync set up takes some patience. But it's way easier than copying every single event by hand—or worse, missing your kid's school play because it never made it from the school calendar to your phone.
Step 4: Use Food Tracking to Sync Meals With Your Schedule
Now that your calendars are synced, use one more scheduling tool to simplify daily planning: food tracking.
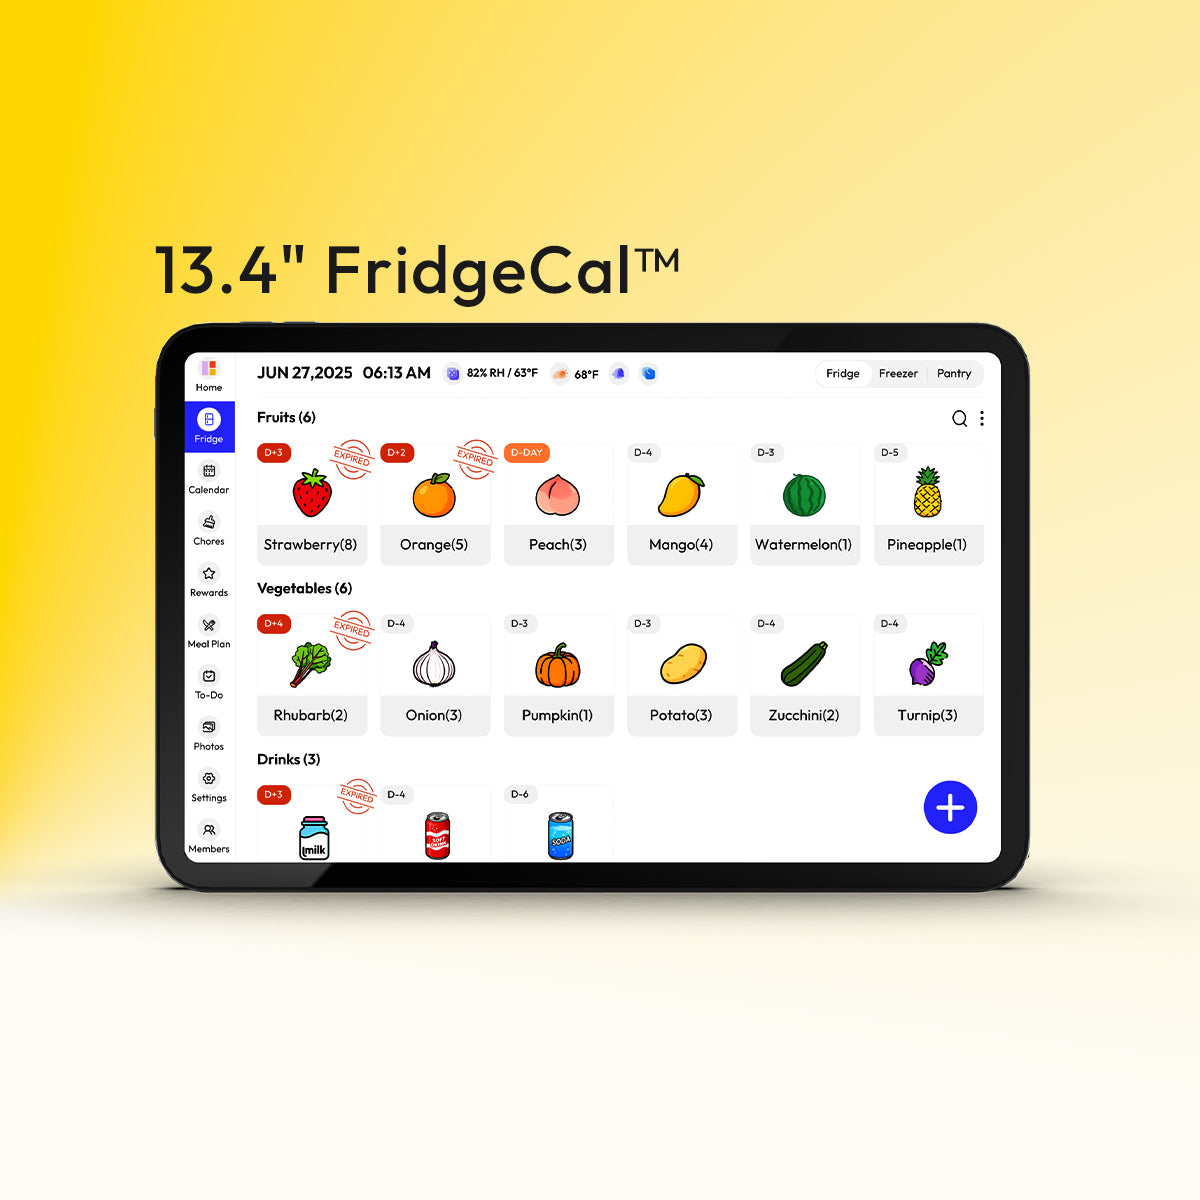
Wasted food can cause scheduling chaos. You cannot plan what's for dinner tonight when you don't know what is about to expire or what needs to be eaten. This is where the Smart Fridge Manager feature comes into play. It is a feature of the Everblog Digital Calendar. It links your food supplies with your family schedules.
How It Works With Your Calendar:
- Quick grocery input: You can add your groceries using 15 different categories. It takes just 5 minutes.
- Expiration alerts sync to your schedule: You get reminders two days before the food is due to expire, not the day after. If you see "Chicken Expires Thursday" on Tuesday, you also see Wednesday's schedule and can plan dinner for the next day.
- Connect food to availability: Wednesday night, the whole family is home by 5:30. The chicken is also expiring the next day. You now know what's for dinner! Thursday everyone has activities until 7? Save that chicken for another night and grab something quick.
- Check inventory while shopping: You can bring up the entire list from the store on your phone. You never have to buy duplicates. It all syncs instantly with your calendar.
Step 5: Write Chores That Actually Get Done
Vague chores don't get completed. "Clean your room" means different things to a parent versus a seven-year-old. When tasks on a digital chore chart are too general or complicated, kids either skip them or do half the job and call it done.

Make Tasks Specific and Achievable
- Be precise with frequency: Instead of "clean bathroom regularly," say "wipe bathroom counter every Monday and Thursday." The word "regularly" is subjective. "Every Monday and Thursday" is objective.
- Determine what "done" means: For example, "Dishes are done when: sink is empty, dishwasher is running, counters are wiped, hand towel is clean." Break down the invisible steps that you, as a responsible person, perform naturally. What looks like one task to you is really four distinct tasks to them.
- Estimate the time required to finish the task: "Make your bed (3 min)" is much more appealing than the task list without the time estimate. This will also help identify the tasks that you may have been undervaluing.
- Identify the tools required to perform the task: For example, "Take out trash (grab bags from under the sink)" removes the excuse that the bags are not available. "Water plants (use green watering can by back door)" removes the excuse that the watering can is not available.
Break Complex Tasks Into Simple Steps
If a chore takes more than three steps to explain, it's actually multiple chores pretending to be one. Here's how to split them:
| Too Complex | Better Approach |
|
Clean kitchen |
|
|
Get ready for school |
|
|
Clean bedroom |
|
Kids' working memory typically holds 2-3 steps at a time. "Clean the kitchen" asks them to remember and execute 8+ steps in order. Their brain can't do that yet—developmentally, they're not there. Split tasks into discrete, completable actions.
The Everblog advantage: The digital chore chart uses interactive checklists. Kids tap each sub-step as they complete it. You see which steps were done and which were skipped—no more "I did it!" arguments when they completed 2 of 4 steps.
Step 6: Create Reward Rules That Stop the Bargaining
Kids will negotiate endlessly if the reward system isn't completely clear from the start. "How many points is this worth?" "Can I get extra for doing it faster?" When the rules change based on mood or circumstances, the whole system falls apart.
Post the Point System Where Everyone Can See It
Write down exactly what each chore is worth and don't change it mid-week. Display this chart on your family calendar display so kids can calculate their own totals:
| Chore | Points | Frequency |
| Make bed | 3 | Daily |
| Feed pets | 2 | Daily |
| Clear dinner table | 4 | Daily |
| Take out trash | 5 | Twice weekly |
| Vacuum living room | 8 | Weekly |
| Fold laundry | 6 | As needed |
Balance Quick Wins With Bigger Goals
Kids lose motivation if rewards feel impossibly far away. Balance instant gratification with long-term targets:
| Points Needed | Reward | Timeline |
| 10 points | Pick tonight's dessert or movie | Daily |
| 25 points | Extra 30 min screen time | Few days |
| 50 points | Friend sleepover or special outing | Weekly |
| 100 points | Choose weekend family activity | 2-3 weeks |
| 200 points | New book, game, or toy | Monthly |
Daily small rewards maintain momentum. Kids need frequent positive feedback. Going 3+ days without any reward kills motivation. Weekly medium rewards teach delayed gratification. Monthly big rewards only work if they're getting frequent small wins along the way.
Step 7: Set Reminders That Help Without Annoying Everyone
Too many reminders and people start ignoring them. Too few and important things get missed. The trick is matching reminder timing to what actually needs remembering.
When to Set Reminders
1. Day before for anything needing prep
Reminders 24 hours in advance can be helpful when you need to prepare, plan, or organize:
- Doctor appointment tomorrow at 3 PM → Reminder today at 3 PM: "Doctor appt tomorrow - bring insurance card."
- School project due Friday → Reminder Thursday evening: "Emma's project due tomorrow."
You can prepare without worrying. Reminding yourself to buy a party gift two hours before the party only causes unnecessary anxiety.
2. Same morning for routine stuff
Reminders in the morning can be helpful when you have recurring events:
- Soccer practice every Tuesday at 4:30 → Reminder Tuesday 8 AM: "Max has soccer today at 4:30."
- Piano lesson every Thursday at 3:00 → Reminder Thursday 8 AM: "Emma's piano lesson today."
You don't need to be reminded three days in advance to go to soccer practice on Tuesday. That's just unnecessary.
3. One hour before for time-critical tasks
Reminders one hour in advance can be helpful when you're in a time-sensitive situation:
- Pickup at 5:00 → Reminder at 4:00: "Pick up Max in 1 hour."
- Guests arriving at 6:30 → Reminder at 5:30: "Start dinner prep - guests arrive in 1 hour."
You can finish what you're doing, then go to what you need to do. Not sooner, as you'll forget again. Not later, as you'll be rushing.
Where Reminders Should Show Up
Put these on the kitchen display:
- "Start dinner prep at 5:00"
- "Recycling goes out tonight"
- "Defrost chicken for tomorrow"
- "Kids: homework time"
These need to catch whoever walks past first. They stay visible on the screen until someone handles them. If it only goes to one person's phone, it becomes their job instead of a family task.
Send these to phones:
- Personal appointments (dentist, haircut)
- Pickups when you're already out running errands
- Work meetings
- Anything location-specific that needs to reach you away from home
The visible calendar display beats phone notifications when the whole family needs to know something. A phone alert disappears after you swipe it. The kitchen screen reminder stays there until it's done.
Step 8: Do a Weekly Ten-Minute Reset to Keep It Working
You built the perfect system three months ago. Now it looks like a mess. Tasks completed six weeks ago are still cluttering the screen. The soccer practice time changed, but the calendar still reflects the old schedule. Someone added the same event twice. The family command center that you were so excited about? Nobody looks at it anymore.
The trick is to spend 10 minutes a week keeping it clean before it gets too messy.
Your Reset Routine
Pick Sunday evening—or whatever day works for your family—and take ten minutes to reset everything.
| Task | Time | What to Do |
| Clear out the old stuff | 3 min |
|
| Spot conflicts before they happen | 3 min |
|
| Update recurring events that changed | 2 min |
|
| Review what food is expiring | 2 min |
|
End with a Two-Minute Family Walkthrough
Get everyone together and run through the highlights: "Monday Emma has piano after school. Wednesday is packed—Max has soccer at 4:30 and Emma's project is due. Friday is Grandma's birthday FaceTime at 6. Saturday Max has a game, we leave at 8 AM."
You're not reading every single entry. Just flag the busy days, time-critical stuff, and anything that needs preparation. Takes two minutes. Prevents a week's worth of "wait, I didn't know about that" conversations.
This easy practice keeps your calendar functioning as your family command center, not just another thing on Mom's mental to-do list.
Make Your Family Calendar Display Work for Everyone
Getting the setup right is what separates calendars that help from calendars that get ignored. Color coding, clear chores, smart reminders, and weekly check-ins turn your family calendar display into something everyone actually uses. The Everblog 21.5" Digital Calendar is built around these exact principles—color coding for each family member, a digital chore chart with rewards, and on screen reminders that catch attention without annoying everyone. No subscriptions, just a setup that works from day one.
FAQs
Q1: Can there be more than one person editing the calendar?
Yes. Most electronic family calendars allow multiple users to add or edit events without any problems. Both events will save perfectly. The only time a problem occurs is when two people are editing the same event at the same time. Whoever saves it last wins.
Q2: Should I include the school calendar of my children in our family calendar?
Definitely. You can import the school calendar of your children as a read-only calendar. This way, any school-related activities, such as school holidays, early dismissals, etc., will be automatically reflected in the calendar. You do not have to ask whether there is school the next day.
Q3: What if the internet connection is lost?
The calendar is still usable. The events you already entered in the calendar remain visible. Your family members can still see the events on the calendar. However, you cannot see any new entries in the calendars that you previously synchronized until the internet connection is restored.
Q4: How do I handle kids of different ages using the same calendar?
For younger kids, the chores can be very simple, with short names that the kids can read. The interactive checklist is useful in such cases, as the kids can simply tap on the screen to complete the task. For older kids, the tasks can be more complex. In such cases, the kids can be given a chance to input their own tasks. The color-coding system is useful for all the kids. Each kid has a different color, which is useful in distinguishing between the tasks of different kids.


